Amazon S3, which stands for Amazon Simple Storage Service, is a technology that was introduced by Amazon Web Services for cloud storage that has since been extended more broadly into a standard programming interface↗.
Our S3 support lets you store credentials for your S3 object storage buckets on your Urbit ship; once you have done so, you will get additional functionality for uploading your own media within Chat and Groups (for avatars).
To enable S3 support on your ship you'll need to first set up a bucket, and then add its credentials to Landscape using either Landscape or the Dojo.
Bucket Setup
We recommend DigitalOcean's Spaces, but any S3 provider that supports signature v2 should work.
The bucket has to be publicly readable, allow CORS from * origins, allow GET and PUT methods, and allow * headers. Specific instructions for DigitalOcean are below.
In DigitalOcean you'll want to log into your existing account or create a new one if you don't already have one. You can use DigitalOcean for your S3 host even if your Urbit planet is hosted elsewhere.
Click the green Create button at the top of the project page, then click Spaces.
Make the following selections:
- Select the datacenter region closest to you
- Enable CDN if you prefer
- Choose a unique name (this is your bucket name)
- Select a project (or leave the default if you don't have multiple)
Once you've created your space you'll want to navigate to its settings in DigitalOcean.
Then you'll want to set the CORS Configurations as specified above, this should look like the following image (your endpoint will vary depending upon region). 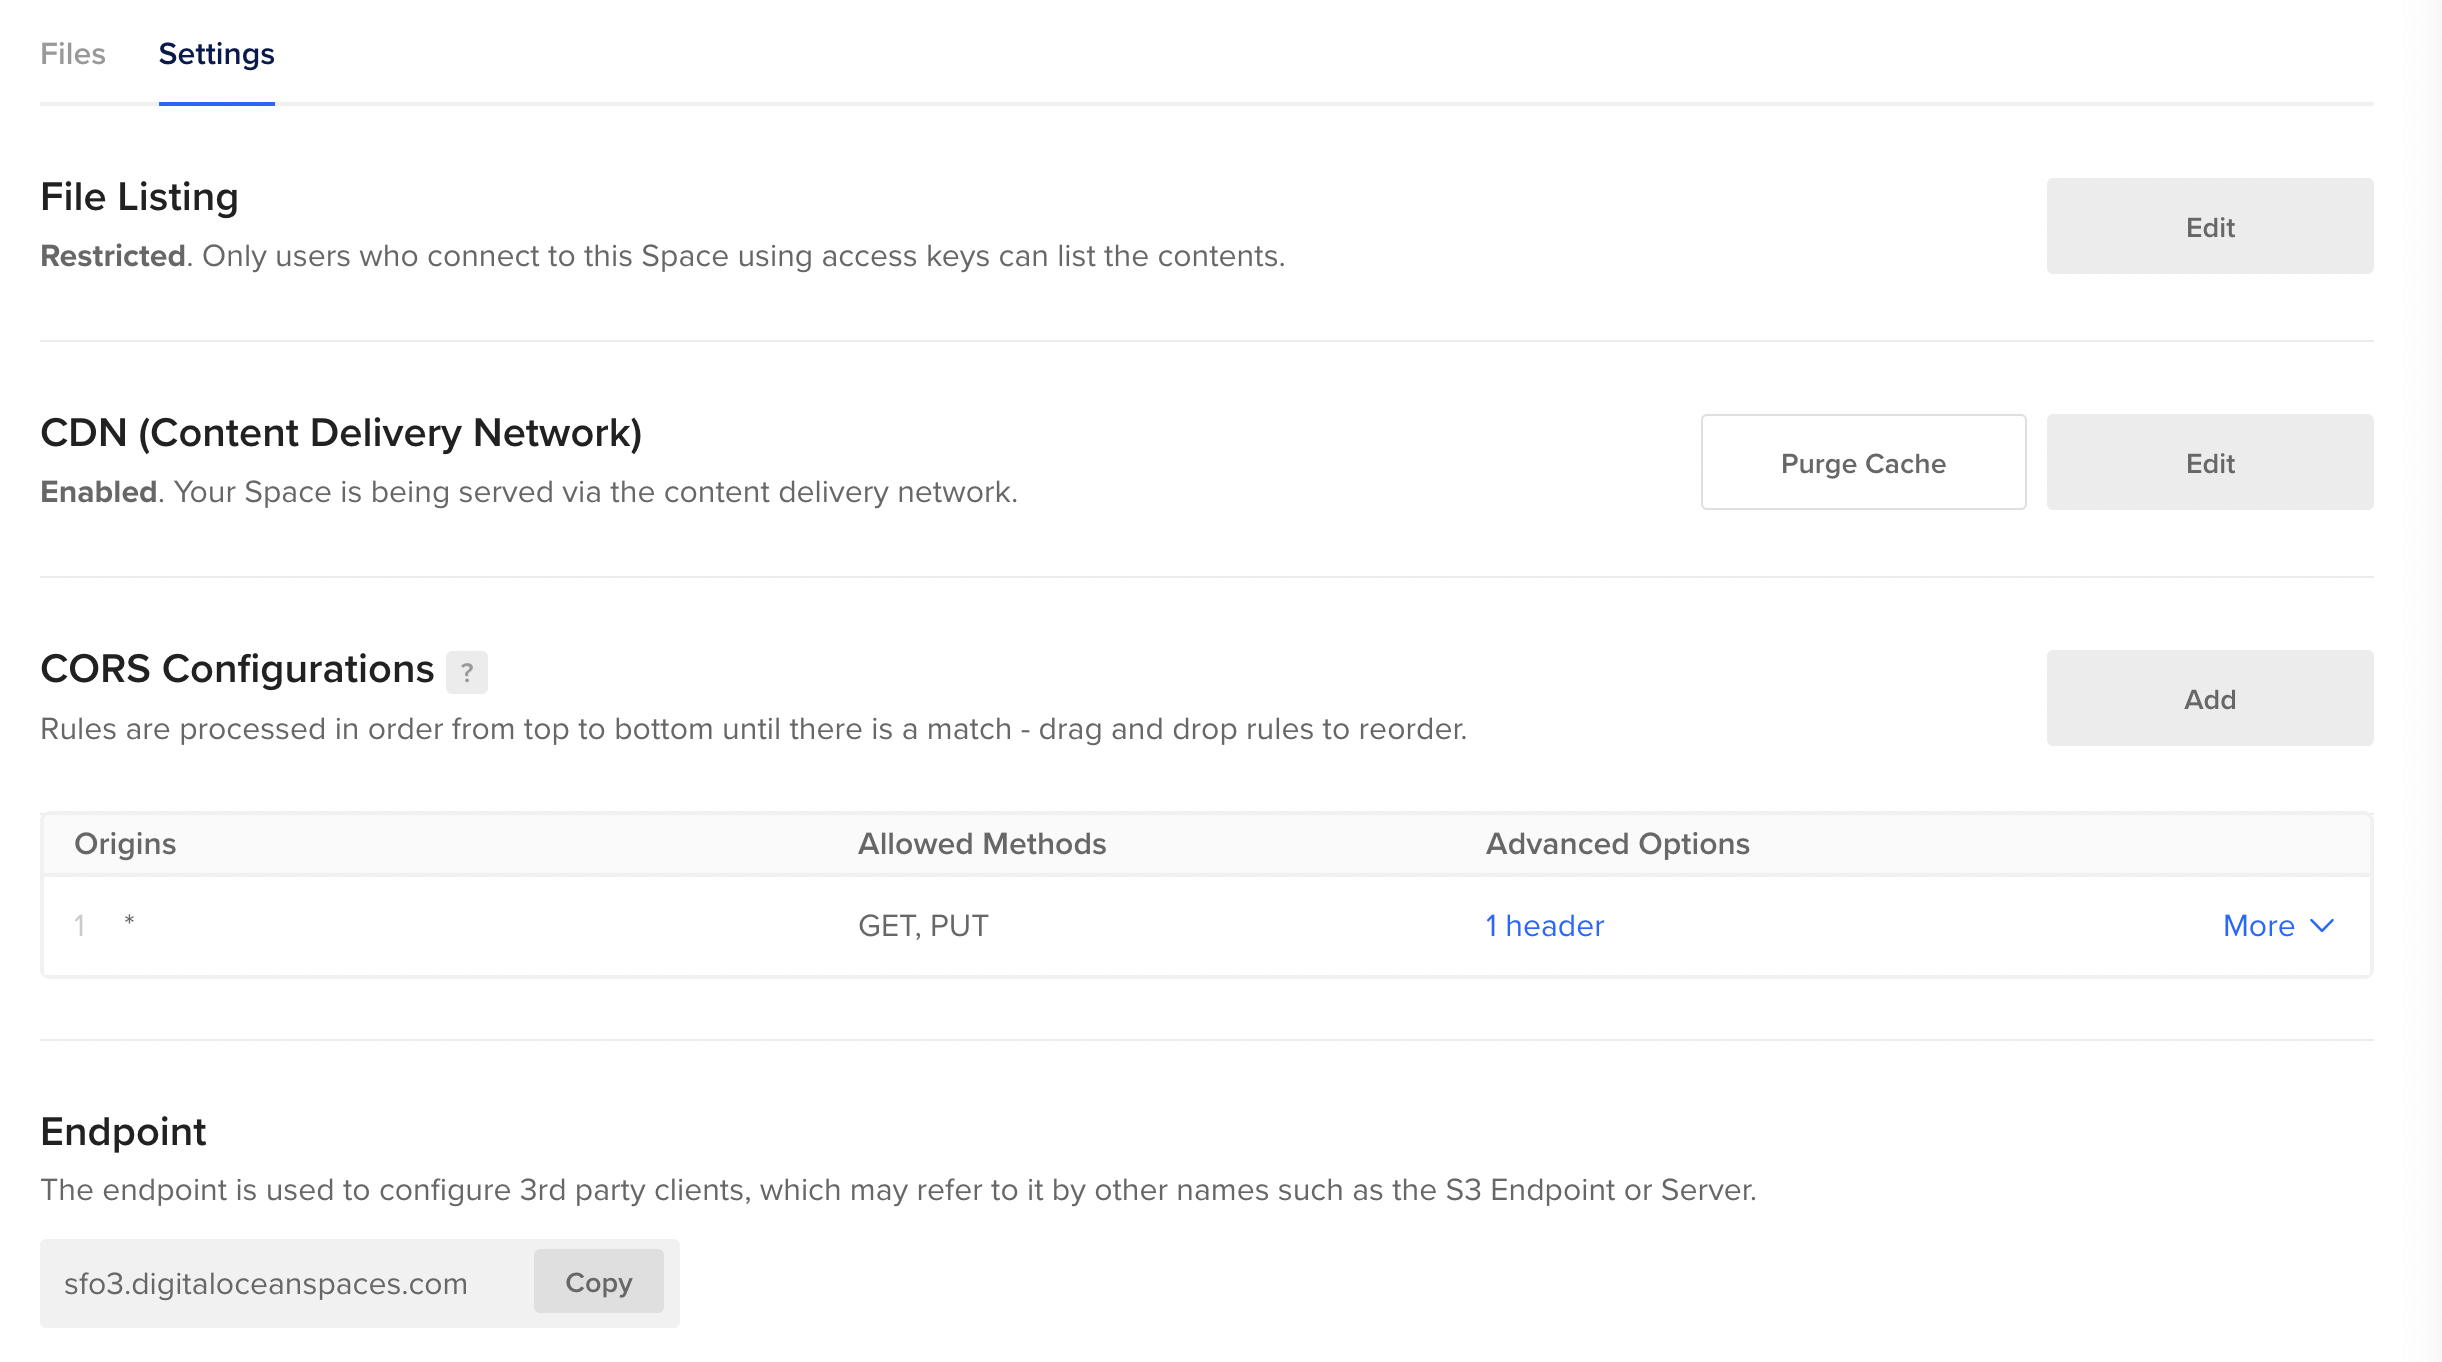
 Finally you'll need to create an API key so you can configure your ship to have access to your newly created S3 bucket.
Click API in the bottom left of the DigitalOcean navigation bar on the left side of the webpage.
Generate a new Spaces access key. Note that this is distinct from a Personal access token. You'll need to copy the access key and secret. Don't navigate away from this page as the secret will only be shown when it is initially created.
Now that we have your S3 ready, we can update the information on your ship.
Add your credentials: Landscape
Navigate to your https://<your-ship-url>/apps/grid/leap/system-preferences/storage, or click your sigil in the upper-left corner of the window and navigate to Settings -> Remote Storage.
The Endpoint depends on the region you selected, but can be found in the settings for your space shown in the image above (in that image we're using the sfo3 region). The Endpoint should be entered in the format https://<your-region>.digitaloceanspaces.com.
The Access Key ID and Secret Access Key are from the API key we just generated. Put each one in the correct field and save.
The Public URL base field should be left blank for DigitalOcean configuration.
The Region should be global. This is the default for DigitalOcean, which has no awareness of regionality through their S3 API.
The Bucket Name is the name of your DigitalOcean Space.
Once you've added that you'll also need to click "Save" at the bottom of the form.
You should be good to go! Test that things are working by attempting to attach or send and image via chat. It should work. You can manage your images by logging into DigitalOcean and looking at the folder in your newly created space. You can use your same space for multiple urbit IDs by creating new API keys. Each ID will create a new directory within that space using its name by default.
To manage your S3 inventory on your urbit, install Silo: web+urbitgraph://~dister-nocsyx-lassul/silo (Warning: still in Beta)
When uploading assets to your DigitalOcean space manually, ensure the assets are public, not private.
Hosting your own S3 solution (Advanced)
If you'd prefer to host your own S3-compatible storage solution locally, have a look at Self-hosting S3 Storage with MinIO.